Screen Recorder For Windows
Recording your screen on Windows 10 is a useful feature that allows you to capture video footage of your desktop activities. There are several methods you can use to record your screen, including built-in options and third-party software. In this guide, I will provide you with detailed instructions on how to record your screen on Windows 10 using different methods.
Method 1: Using the Built-in Game Bar
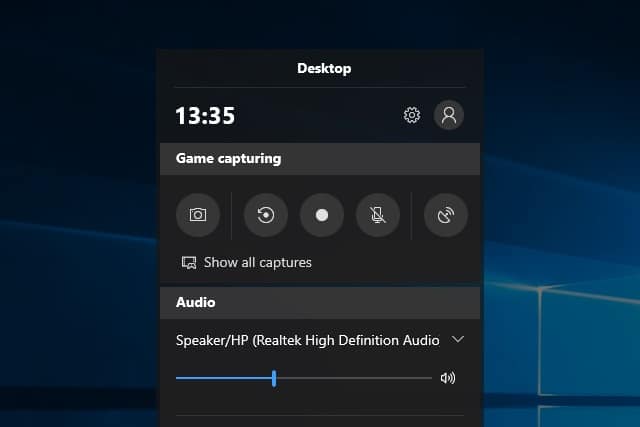
- Press the Windows key + G on your keyboard to open the Game Bar. If prompted, check the box that says "Yes, this is a game" to enable the Game Bar.
- Once the Game Bar is open, you'll see a small bar with various icons at the top. Click on the red "Record" button (a circle icon) to start recording your screen.
- Alternatively, you can also use the keyboard shortcut Windows key + Alt + R to start and stop recording.
- While recording, the Game Bar will display a timer indicating the duration of the recording. You can also access additional options such as recording audio, capturing screenshots, and controlling microphone settings by clicking on the icons in the Game Bar.
- To stop recording, click on the red "Stop" button in the Game Bar or use the Windows key + Alt + R keyboard shortcut again.
- By default, the recorded video will be saved in the "Videos" folder in your user directory. You can access it by navigating to "This PC" > "Videos" > "Captures".
Method 2: Using OBS Studio (Open Broadcaster Software)
- OBS Studio is a popular third-party software that offers advanced screen recording and streaming capabilities.
- Download and install OBS Studio from the official website (https://obsproject.com).
- Launch OBS Studio and configure your recording settings. Click on "Settings" in the bottom-right corner of the window.
- In the "Output" tab, select your desired recording format and quality settings. You can choose formats like MP4 or FLV and adjust the bitrate and resolution according to your preferences.
- Navigate to the "Video" tab and set the base and output resolutions. It's recommended to use the same resolution as your desktop for optimal results.
- In the "Audio" tab, choose the audio devices you want to record. You can capture system audio, microphone input, or both.
- Close the settings window and return to the main OBS Studio window. Click on the "+" icon in the "Sources" box to add a new source.
- Select "Display Capture" to record your entire screen or "Window Capture" to record a specific application or window. Follow the on-screen instructions to configure the capture source.
- Click "Start Recording" to begin the screen recording. You can also use the "Start Streaming" option if you want to broadcast your screen live.
- To stop recording, click on the "Stop Recording" button or press the corresponding keyboard shortcut (Ctrl + Shift + F10 by default).
- By default, OBS Studio saves recorded videos in the "Videos" folder. You can change the output directory by going to "Settings" > "Output" > "Recording" and modifying the "Recording Path" field.
Method 3: Using Windows 10's Screen Recorder
- Windows 10 has a built-in screen recorder that can be accessed from the "Game Bar" or the "Settings" app.
- Press the Windows key + G to open the Game Bar.
- Click on the "Capture" button (a square icon) to open the screen recording options.
- In the "Capture" window, click on the "Record" button (a circle icon) to start recording your screen.


